Showing posts with label Baking. Show all posts

Saturday, September 12, 2015

Jess' bakes & cooks: Simple Oven Baked Fries


I am excited to present my first recipe sharing blogpost today! :) Those who knows me personally will learnt I have started baking and cooking more frequently on a personal level ever since we have gotten our own home. Hence I will like to start sharing some simple recipes that everyone can try at home!

Today I will be sharing a recipe for oven baked fries which is a great healthier alternatives to deep fried fries. These goes well with home prepared burgers on weekends! 

Ingredients: (servings for 2-3)
3 medium russian potatos
1 Tbsp olive oil

(For seasoning)
2 Tbsp salt
1 Tsp chili powder
1 Tsp black pepper

Grated cheese for sprinkling

Instructions:
1. Peel & wash potatos
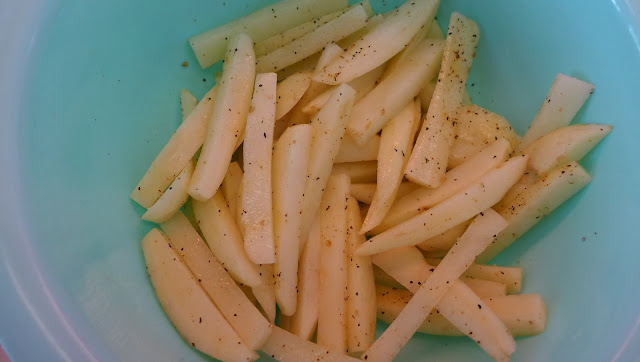
2. Cut potatos into fries shape. For crispy fries, cut into even 1/4 inch thin slices.

3. Soak slices in water for at least 1/2 hour. The longer you soak, the more starch removed, the crispier the fries will be.
4. Drain & rinse slices and lay on paper towel. Blot slices to remove excess moisture.
5. Preheat oven to 200°C 

6. Line baking pan with parchment paper or foil. Grease the surface with some oil.

7. Transfer slices to a dry bowl and coat them with 1 Tablespoon olive oil. Mix in 1/2 of the prepared seasoning. Toss well till all slices are coated evenly.
8. Spread slices on prepared baking tray in one layer. Ensure no overlapping.
9. Bake in preheated oven for 30 minutes. Turn the slices at the 15th minute and another time after the 25th minute.

10. Remove baking pan and heat oven to 220°C.

11. Return slices to oven and bake till golden brown and ends a little burnt. 

12. Sprinkle remaining seasoning on the baked sfries. Transfer to serving plate and top with grated cheese.
As we have a mix preference for crispy and thick fries, I have the potatos sliced into uneven pieces to get the mix combo. We had it with our home prepare burgers and salad. Turned up really good! Do give it a try!

Thursday, February 06, 2014

Philip Avance Air Fryer XL: Baking Muffins

Philip Avance Air Fryer XL: Baking Muffins With some tang vouchers we won from a wedding competition, Mr Kwek & I decided to purchase Philip's Air Fryer for our future kitchen!
The Philip Air Fryer should be pretty well known by now. It is a multi-cooker that uses rapid air technology to fry, bake, grill and roast. Sounds amazing isn't it?
We were both excited yet skeptical about the air fryer being able to aid kitchen dummies like us in preparing meals. However, since we have the tang vouchers and the latest model was on sales, we decided to get it.
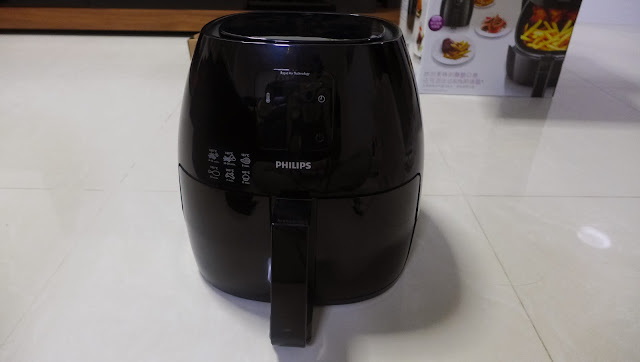
Philip Avance Air Fryer XL has a larger capacity of 1.2L as compared to its older generation in the viva collection which only has a capacity of 0.8L. Also, it uses a digital screen to control the temperature and timing. It can remember your favorite temperature and timing with its preset feature. The feature which we felt was the deciding factor to choose Avance over Viva was the basket and pan design.
As you can see, the pan is attached safely inside the roller drawer (which can be detach for washing) while the basket is a part on its own. On the other hand, the Viva collection has the basket attached to the pan which is easily (in a bad way) detachable from each other with a press of a button at the middle of the handle. This makes the pan prone to dropping when plating the food. Personal experience with the dropping while seeing the display set make us decide quite immediate to say no to the Viva air fryer.

Happily we paid up and had it delivered to us the following day. As the Air Fryer is famous for air frying fries to be as crispy as the traditional deep fried fries, by right, fries should be the first item to be tried in the air fryer. However, we went left and tried baking muffins instead.
Its been close to 4 years since I last baked anything and sine my recipe book is deep hidden in a corner of my room (reads: can't find!), I decided to use Betty Crocker's premix and try baking with the Air Fryer.
This is as easy as ABC. All you will need is water, vegetable oil and eggs, stir and ta-da! The mixture is all ready to be spoon into the muffin cups and bake.
 
The air fryer XL can fit up to eight standard sized muffin cups.
For a start, we tried baking one muffin, as per Philip's instruction, at 180degrees for 15minutes. The muffin burnt on the outside but the inside was still great, though a little dry.
We continued experimenting with different set of temperature and timing before landing ourselves with the perfect combination of 170degrees for 10minutes. With this combination, the muffin turn out to be golden brown on the outside, soft, moist and fluffy on the inside.
Top L-R: 180degree 15mins, 180degree 12mins, 180degree 10mins
Bottom L-R: 175degree 10mins, 170degree 10mins
I do not think there is any difference in taste and texture for the air fryer muffins compared to those from the traditional ovens. The only difference will be the appearance. Oven baked muffins will puff up nicely in the middle, where else air fryer muffin doesn't.

Other than the not-so-appealing appearance,
Air Fryer is definitely dummy-baker approved!